Showing posts with label home. Show all posts

Sunday, April 24, 2011

sunburst obsession

I have a confession. I've recently become obsessed with starburst mirrors and wall art. Okay, maybe the word "obsession" is a bit strong, but suffice it to say that it's caused me to eye every bed, couch and table in my house where a perfectly centered sunburst might be just the finishing touch that it needs.  

Case in point: a few years ago, I stumbled across this beauty, which spans a gorgeous four feet across the papaya-colored wall in my kitchen (please excuse the poor photo quality, ugly oak cabinets, and photographer's reflection). Two years later, this thing still makes me feel happy every time I look at it. Kind of like my son. Er, perhaps that's not the right comparison. In any case, I love it so much that it inspired the holiday cards I sent to my clients last year.

Add caption


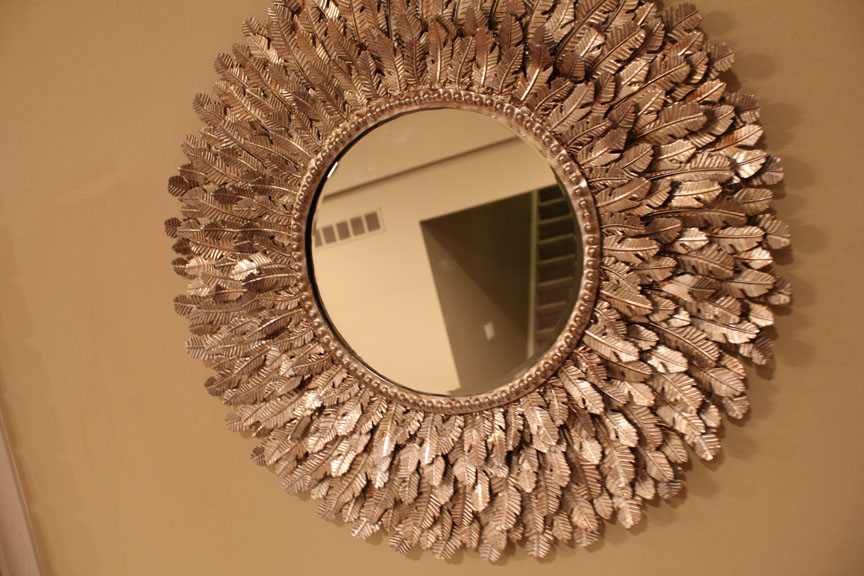
Then came this leafy champagne-colored treasure, which I discovered last summer during a trip to Traverse City. At $175, it's pretty much the most expensive thing I've ever bought for a wall... but I had seen it months earlier and when I returned, it caught my eye again. Needless to say I snatched up, felt a wee bit guilty, but quickly got over it. 


Then came my more recent attempt to "adultify" the playroom in our lower level (translation: basement). That's right... adultify. You'll notice that this photo is strategically cropping out the train table and baskets of toys on either side.


Now that I've proven my case, you can now understand why I was so thrilled to come across these fun DIY projects that involved making a sunburst mirror... out of rulers! See the full project here on Design Sponge! Office supplies + groovy home décore = pure genius in my books. And no, I can't take credit for this mirror.


Another clever iteration is this wooden ruler mirror made out of wooden rulers (25 cents ea) and shish kebab skewers.


And perhaps my favorite for this spring due to the crisp, fresh feel of white against a colored wall (as well as the fact that this is made out of PAPER!) is the one shown below. Click here for complete DIY instructions by Nesting Place.


Three tips for using a sunburst mirror or wall art in your décor:

1. Think balance. These work best when centered over a piece of furniture such as a console table, a fireplace, or a bed. When hanging, consider also the distance between the circle and the piece of furniture. Many people hang their art too high on the wall. The center of your circle should be at eye level for the average person, unless of course you are positioning above a fireplace or higher piece of furniture. The mirror below could have been hung about 6" higher. Still, it's a gorgeous example of how a few unique pieces within a neutral palette can give a room character and a little "glam." Love.


2. Consider proportion and visual "weight." The mirror below feels proportionate to the room size, and fills the space over the fireplace well. It's also reflective, which gives it a lighter "visual weight" compared to the mirror over the bed (shown above). So even though it's a large piece, it doesn't feel too heavy in the room. Something with mirrored or metallic "spokes" helps it feel light and airy despite its size. Or you could also paint a darker frame white, as shown in the third picture.


3. Have fun. Break the rules a little. Display a group of them together on a larger wall. Similar finishes and the repeated circular shape helps to tie this collection together. You could spraypaint a bunch of them white, or add some whimsy to a child's room by painting them in a few different shades of the same hue (ie. pink).


Happy sunbursting!


Monday, February 7, 2011

Inklings DIY: Wipe-off Memo / Menu Board

Hello!

One of the goals I've had with this little blog is to share some DIY ideas on using paper to organize, inspire, and beautify the everyday.

Let me preface this by saying that I am not a meal planner. I'd like to say that I shop and cook as they do in Europe: buy ingredients the day of, finding inspiration in what looks freshest and in season. But most often, my "European Market" translates to which take-out restaurant is first on my speed dial. While other mothers were proudly sharing recipes on what home-made baby food their youngsters were benefiting from, I was racking my brain for what chef Gerber had in store for my little guy during the drive home from work. Which leads to my first official Inklings D.I.Y which, though it is somewhat self-serving, I hope will spark an idea in you as well.

White boards? They belong in an office, plain and simple. Chalk boards? Charming, but messy. Here's a great little wipe-off memo board that you can make out of any picture frame:


What you'll need:

• Picture frame (any size will do – mine fits an 11 x 14" frame)
• Whiteboard marker (available at any office store)
• Patterned or plain paper for the background (or print out the picture above; click on the image to expand)
• Sold-colored paper to write out days on left (optional)

Option 1: Use a printer
For the insert above, I designed it on my Mac and printed it on my Epson large format printer. Don't have a large format printer? No problem. Print the above template at a smaller size, or design a similar one yourself in a size that will fit your frame. I designed this one so it wouldn't a toner guzzler because I'm shamelessly practical. Most of the time. If you want a darker background, go with Option 2.

Option 2: Use scrapbook paper
Choose a background paper, and write your days directly on the paper. You can use any paper you want in the frame, but keep in mind that you want your whiteboard marker to show up against it. Large patterns with high contrast are not recommended. To get the look above, choose two coordinating papers. One will become your background, and one will be for your days. Tape loops will hold everything in place until you've sandwiched them behind the glass. Voila!

What I love about this is that it's easy to change up the look if you get tired of it. Just find (or print) a new piece of paper, stick it in the frame, and you've created a whole new look.

This is one menu board that I don't mind hanging in my kitchen, and it's found its home next to my fridge. So I have no excuses. Unless, of course, I have a particularly rough week. In which case, It will read, "order in; order in; take out; date night..."